Call 24/7 Helpline

Blog

How to Install a Ceiling Fan Australia: A Beginner’s Guide

Table of Contents

Table of Contents

mr sparky electrician sydney ceiling fans

Ceiling fans are essential in Australia for enhancing air circulation, energy efficiency, and residence comfort. In this comprehensive guide, we’ll walk you through everything you need to know about installing a ceiling fan in your home, from selecting the perfect fan to maintaining it for optimal performance.

Key Takeaways

  • Ceiling fans are an energy-efficient and cost-effective solution for Australian homes.
  • Choose a fan that suits your room’s size, design preference, and energy efficiency needs.
  • Follow the manufacturer’s instructions for installation to ensure safety precautions are taken. Seek professional help if needed.

Why ceiling fans?

Ceiling fans are essential in providing an alternative to air conditioning units, helping generate cool summer air and efficiently circulate warm air through rooms during colder months.

Besides creating a comfortable living environment, they also contribute to reduced electricity usage and decreased noise levels. So, it’s no wonder ceiling fan installations are popular in Australia.

In comparison to air conditioners, ceiling fans have several advantages:

  • They are more energy-efficient, consuming up to 40% less energy.
  • They serve as a cost-effective solution for year-round energy savings.

Many ceiling fans have built-in light fixtures, offering additional functionality and convenience.

Do you need an electrician to hang a ceiling fan?

No, you don’t necessarily need an electrician to get your ceiling fan installed. If you’re handy and have experience with electrical tasks like connecting wires and mounting fixtures, then installing a ceiling fan yourself might be feasible.

There are a ton of online resources and tutorials like this one that can guide you through the process.

However, if you have zero experience in any electrical work, ceiling fan installation might be more complex than you expect. Especially if your wiring is not already set up for a fan or your ceiling requires reinforcement.

If you’re not confident in your electrical DIY skills or unsure about your specific situation, hiring a licensed electrician is the safest and most reliable option. Local sparkies like us can ensure a professional, code-compliant installation that provides you with peace of mind throughout the process.

But if you do end up going for a DIY installation, below are the tools you will need to ensure smooth and safe installation process.

Tools needed for ceiling fan installations

Before starting to install a ceiling fan, make sure you have all the necessary tools and materials at hand. Some of the essential items include:

  • A ceiling fan
  • A ceiling fan light kit (optional)
  • A downrod
  • Mounting hardware
  • Wire connectors
  • An electric ceiling box (if needed)
  • A ceiling fan mounting kit
  • Electrical tape
  • Wire nuts

Besides the materials, you will need the following safety equipment:

  • 6-foot ladder
  • Cordless drill with multiple screwdriver bits
  • 4-inch hole saw
  • 7/8 inch wrench
  • Stud finder
  • Non-contact voltage tester
  • Wire cutters/strippers
  • Adjustable wrench
  • Pliers
  • Dust mask

These tools will help guarantee a safe and trouble-free installation process.

Safety Precautions

Safety should always be a priority during the ceiling fan installation process. Especially if you’re doing it yourself. Make sure to follow these steps when installing a new fan:

  1. Turn off the power at the breaker or fuse box before beginning the installation.
  2. Use a voltage tester to ensure there’s no live current in the wires.
  3. Follow ladder safety guidelines when working at heights.
  4. Wear protective gloves and eye protection when handling the fan and its components.

If you don’t have any of the tools and safety equipment required in installing ceiling fans, you might be better off hiring a professional electrician to handle the installation of the fan, connection of the main electrical power supply and installing all necessary electrical components, including the wall switch and outlets.

But if you’re house is fully equipped with the required tools, you can proceed to your DIY electrical work.

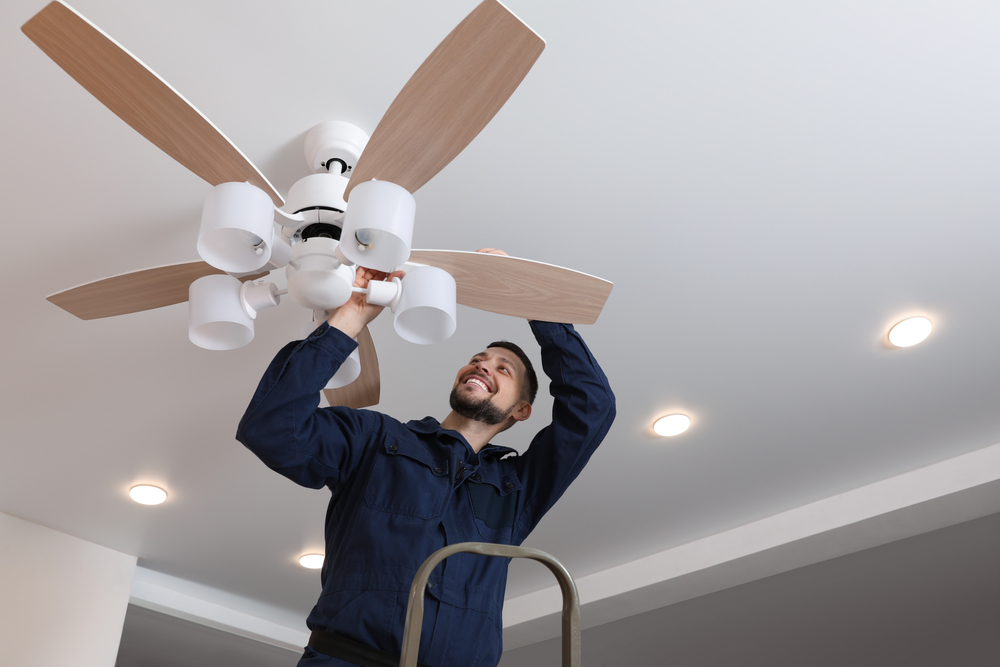
How do you replace or install a ceiling fan?

As certified and accredited electricians, ceiling fan installation is considered a major electrical upgrade or improvement to a home. So as much as possible, this should only be performed by an experienced and licensed electrician. This ensures that the ceiling fan has been installed correctly and safely.

However, if you’re pretty comfortable with your wiring and electrical skills, you may do a good job installing your ceiling fan. Below is a step-by-step breakdown of how to install a ceiling fan.

Following these directions is crucial to ensure a successful ceiling fan installation.

Step 1: Removing the old ceiling fan

Before installing your new ceiling fan, you’ll need to remove the old fixture or fan from the ceiling mount safely. You can skip this if you’re installing a brand-new fan. To do this, follow these steps:

  1. Turn off the power to the circuit at the breaker box.
  2. Unscrew the mounting screws and remove the fixture.
  3. Disconnect the wires from the existing light fixture.

Safely and cautiously removing the old fixture creates a clean and secure space for your new ceiling fans.

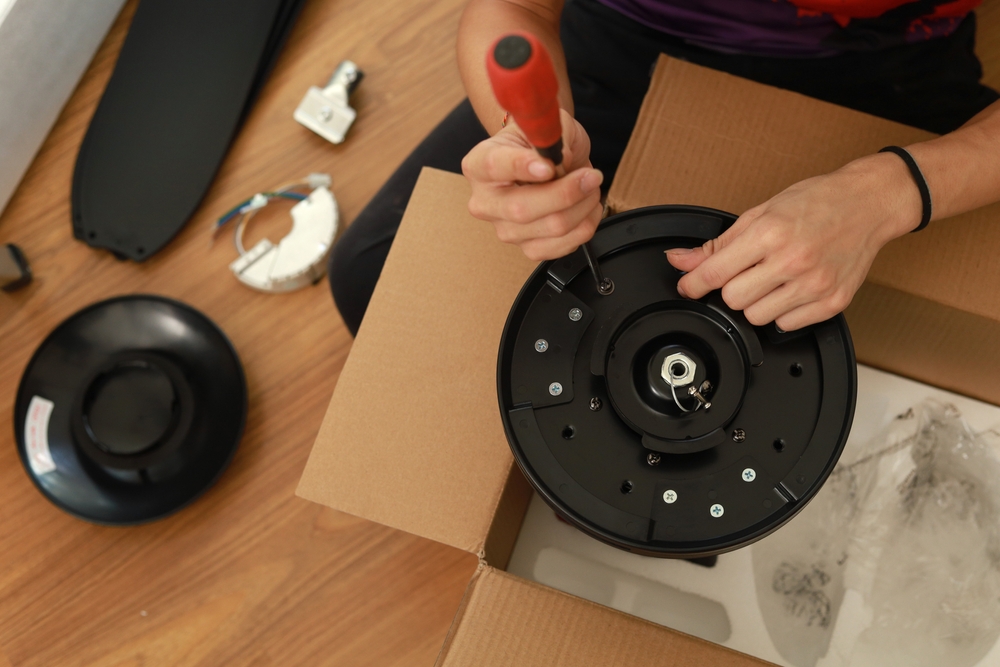
Step 2: Installing the mounting bracket and electrical box

The next step is to install the mounting bracket and electrical box to support your new ceiling fan. Here’s how:

  1. If there is an existing electrical box, make sure it can hold the weight of the new ceiling fan. If not, start by changing out the current electrical box.
  2. Securely install the new electrical box into the space and rotate it until it is firmly in place.
  3. Ensure that the new box is fan-rated and complies with Australian height and weight regulations.

Once the electrical box is securely in place, attach the mounting bracket to the fan and affix the bracket to the ceiling using the screws provided. This will ensure that your fan is anchored correctly and ready for wiring.

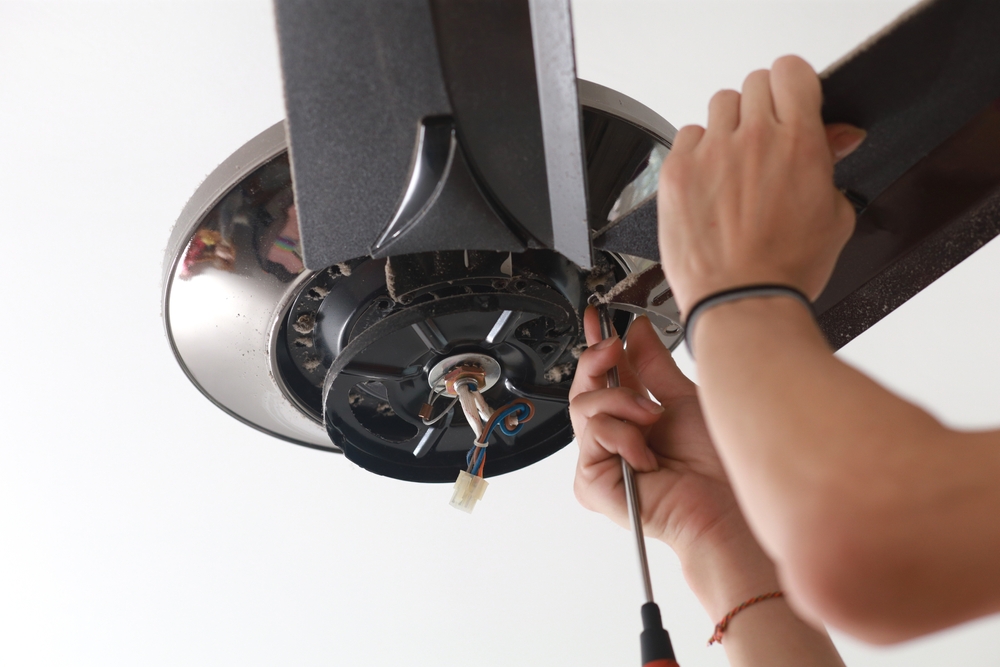
Step 3: Wiring the ceiling fan

Now it’s time to wire your ceiling fan according to the manufacturer’s instructions.

First, connect the ceiling fan wiring by attaching the fan’s wires to the wires from the electrical ceiling box:

  • the black wire from the fan should be connected to the black wire from the electrical box
  • the blue wire from the fan to the red wire from the ceiling (if present)
  • the white wires from the fan and ceiling together
  • the green or bare copper wires together

The connection between coloured wires may vary depending on the manufacturer’s manual so make sure to carefully read it as well.

Once the wires are connected, secure the fan to the mounting bracket. Be sure to double-check all electrical connections and wire connections to ensure they are correctly installed and connected.

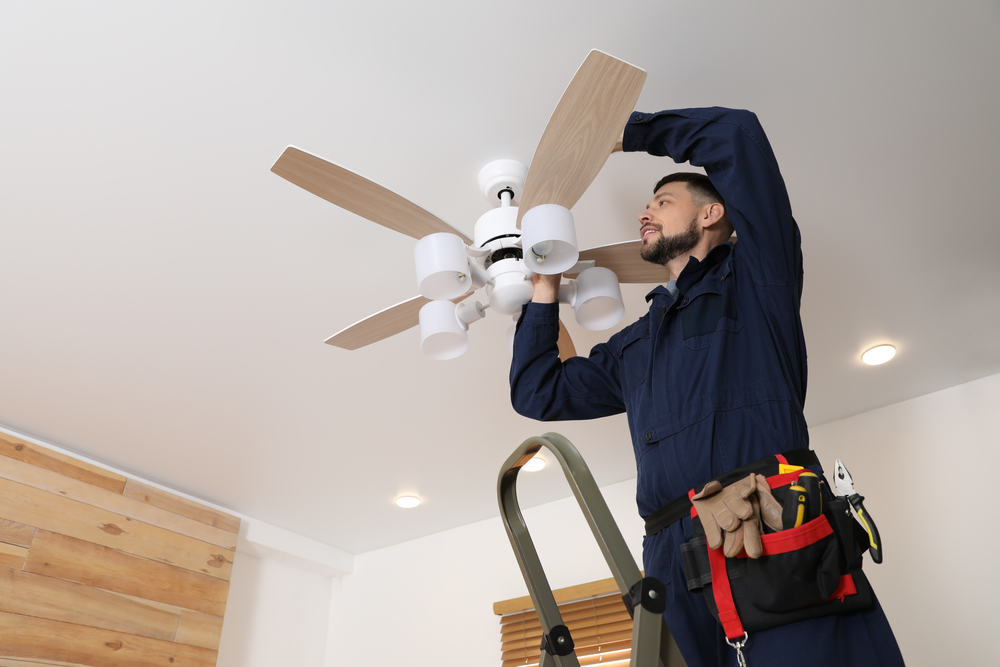
Step 4: Attaching the fan blades and light kit (if applicable)

With the fan securely mounted and wired, the final step is to connect the ceiling fan blades and light kit if your unit has the lighting fixture. To do this, first, secure the blades to the fan using the screws and washers provided.

Next, if your fan has a light kit, follow these steps to mount it securely to the fan:

  1. Connect the light kit’s white wire to the fan’s white wire.
  2. Connect the non-white wire to the fan’s non-white wire.
  3. Tuck the wires into the fan housing.
  4. Attach the light kit or light bulbs to the fan using the provided screws, tightening them to ensure the light kit is secure.

Finally, install the light fixture, following the manufacturer’s instructions for your specific ceiling fan and light kit.

Common DIY Mistakes and How to Avoid Them

During installing a ceiling fan, avoid typical DIY errors that could result in ceiling fan malfunction and safety risks. Some of these mistakes include:

  • Not affixing the fan securely to the ceiling
  • Incorrectly wiring the fan
  • Disregarding the importance of balancing the ceiling fan blades
  • Not adhering to the manufacturer’s instructions and guidelines

For a trouble-free ceiling installation, please seek professional help from a licensed electrician, as they will use the correct tools and materials and observe necessary safety measures.

Choosing the Right Ceiling Fan for Your Home

As you choose the ideal ceiling fan for your home, consider factors such as size, energy efficiency, design, and added features like remote control fan functionality.

Size and Room Dimensions

Selecting an appropriate fan size based on room dimensions is fundamental for achieving optimal performance. Ceiling fans come in standard sizes, such as 48″ (122cm), 52″ (132cm), and 56″ (142cm), which are suitable for most standard-sized rooms in Australia.

Select a fan with the appropriate blade size for your room’s dimensions to ensure maximum comfort and air circulation. For medium-sized rooms, between 3m x 3m and 4m x 4m, a fan with a blade size of 48” to 56” is recommended. For larger rooms, between 20 and 36 square meters, opt for a fan with a blade size of 132 to 142 cm.

Energy Efficiency

Selecting an energy-efficient ceiling fan can help reduce electricity usage and save on energy bills. Some features that contribute to a fan’s energy efficiency include:

  • Reversibility
  • DC motors
  • Optimised blade designs
  • Smart home technology
  • Energy Star certification

By choosing an energy-efficient fan, you can save money and contribute to decreased energy consumption.

Design and Style

Another important factor to consider when selecting a ceiling fan is the design and style that complements your room’s aesthetics and personal preferences. In Australia, popular styles include:

  • Modern and contemporary styles with minimalistic aesthetics
  • Unique designs with statement blades
  • Beach-inspired designs with palm leaf blades
  • All-over timber designs

For traditional interiors, opt for ceiling fans with vintage looks and classic or antique styles, featuring intricate details and decorative accents. On the other hand, modern interiors are best complemented by sleek and minimalist ceiling fan designs, featuring clean lines, smooth finishes, and modern materials like brushed nickel or matte black.

Ceiling Fan Maintenance Tips

Consistent maintenance is fundamental to maintaining your ceiling fan in prime working condition and extending its lifespan. To maintain your ceiling fan, clean it every two to three months using a cloth or baby wipes, a vinegar and water mixture, or an all-purpose cleaner. Be sure to avoid spraying liquid directly onto the fan.

In addition to cleaning, inspect the following components of your fan for any signs of wear or damage:

  • Blades
  • Motor
  • Bearings
  • Light covers
  • Direction switch

For outdoor fans, check for corrosion or damage caused by weather conditions. Lubricate the bearings with WD-40 or a silicone-based lubricant as needed.

You can also enlist the services of an electrician to check out your fan and other various electrical elements in your home to ensure everything is as it should be.

By performing regular maintenance, you can ensure your fan operates efficiently and lasts for years to come.

When to Seek Professional Help

An electrician should install a ceiling fan. A licensed electrician can ensure that your ceiling fan installation is done safely and in compliance with Australian standards and regulations, providing peace of mind and protecting your investment.

Whether you need assistance installing a new ceiling fan, replacing an old fan, or maintaining your existing fan, professional electricians like the team at Mr Sparky can provide expert help and ensure your fan operates at its best for years.

Summary

In conclusion, installing a ceiling fan in your Australian home is a practical and cost-effective way to improve air circulation, energy efficiency, and overall comfort. By choosing the right fan, hiring a pro, and maintaining your fan regularly, you can enjoy the benefits of a well-functioning ceiling fan for years.

And if you’re looking for an electrician in Sydney to install a ceiling fan in your home, office or business, get in touch with us here at Mr Sparky. We’ve got you covered.

ABOUT THE AUTHOR

Meet Steven, owner of Mr Sparky and seasoned professional electrician in Sydney. With more than 15 years of experience in taking care of the electrical needs of Sydney’s residents, Steven loves to share his expertise and knowledge to ensure everyone is electrical safe. Need an electrician in Sydney – give Mr Sparky a call

HOW CAN MR SPARKY HELP YOU?

You might also like

Backyard Electrical Upgrades for Year-Round Outdoor Living

Imagine stepping into your backyard and finding an outdoor oasis that’s perfect for any season—a place where you can relax, entertain, and enjoy the fresh air all year round. For homeowners in Sydney, particularly those in Inner West Sydney, transforming your outdoor space is not

VIEW POST

Ask an Electrician: Does a Dimmer Switch Save You Electricity?

Welcome back to our “Ask an Electrician” series. Today, we’re shedding light on an energy-saving question that’s critical for homeowners all over Australia, especially in more costly areas like Sydney, particularly those in Stanmore and Inner West Sydney. Mr. Sparky, your local electrician, is here

VIEW POST

HELP IS JUST A CLICK AWAY

Let’s get your Electrical Problems Fixed
Our Team is Ready to Assist, just Fill in the Form